
Testing Degradation of Soil-Biodegradable Plastic Mulches
Summary
Mesh bags and free computer software are used to assess the degradation of soil-biodegradable plastic mulch (BDM) in the field. This method does not capture micro- or nano-plastics.
Introduction
Soil-biodegradable plastic mulch (BDM) can be used as an alternative to polyethylene (PE) mulch in fruit and vegetable production systems. BDM can provide equal benefits as PE mulch to suppress weeds, modify soil temperature and moisture, as well as increase crop yield and quality (Ghimire et al., 2018). BDM is designed to be tilled into the soil at the end of the growing season, creating a potential solution to lower the production of agricultural plastic waste. Within two years, BDMs incorporated into agricultural or forest topsoil should biodegrade at a rate greater than or equal to 90%. This biodegradation must not negatively impact soil health (EN 17033, 2018). Due to differences in field versus laboratory conditions, in-field testing is essential to assess the degradability of BDM in various fields, soils, and climates (Fig. 1). This factsheet helps address this need by providing directions of how to create mesh bags and use free computer software (ImageJ; U.S. National Institutes of Health) to visually measure BDM in soil.
Supplies Required
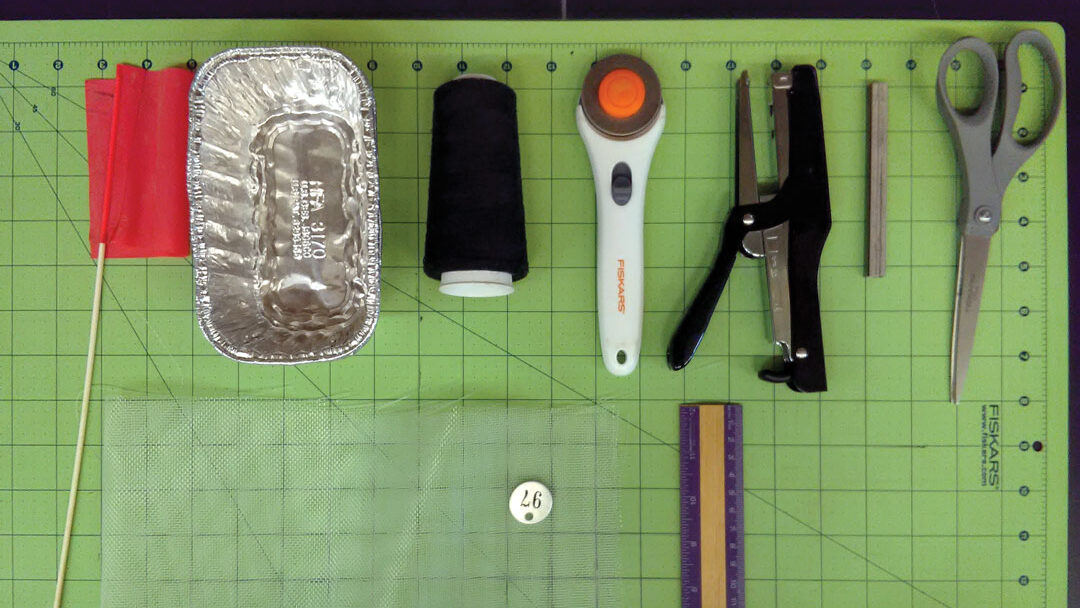
Sewing mesh bags
- Heavy-duty scissors
- Nylon mesh fabric (1 mm mesh size)
- 12-inch ruler
- Polyester or nylon thread
- Sewing machine (serger preferred)
Collecting mulch samples
- Scissors
- 12-inch ruler
- Sealable plastic bags (quart size, ≈ 17.78 cm × 17.78 cm)
- Black permanent marker
Cutting, photographing, and preparing mesh bags
- Table
- Rotary mat
- Rotary cutter
- Aluminum tags, 1.27-2.54 cm diameter (1-½ in.).
- Two 12-inch rulers
- Camera
- ImageJ
- Pre-sewn mesh bags
- Sealable plastic bags (2 Mil, ≈ 2 in. × 2 in.)
- Plier stapler
- Stainless steel staples
Mesh bag burial
- Marking/stake/pin flags
- Mesh bags containing mulch sample(s) and aluminum tag(s)
- Shovel
- Nylon rope or string, 0.32 cm thick, 76.2 cm per 4 mesh bags (1/8 in. thick, 2-½ ft per 4 mesh bags)
Retrieval of mesh bag after burial and imaging
- Shovel
- Scissors
- Paper towels
- Small aluminum loaf pans or light colored tray, 15 cm × 9 cm × 5 cm (6 in. × 3.5 in. × 2 in.)
- Camera
- ImageJ
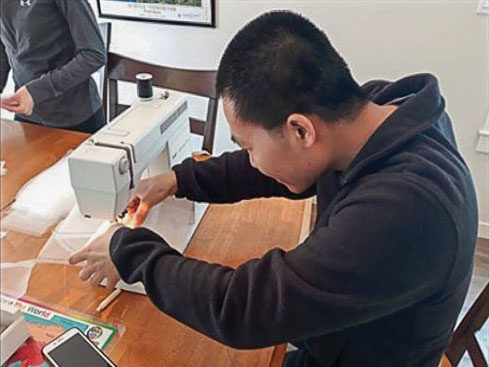
Making the Mesh Bags
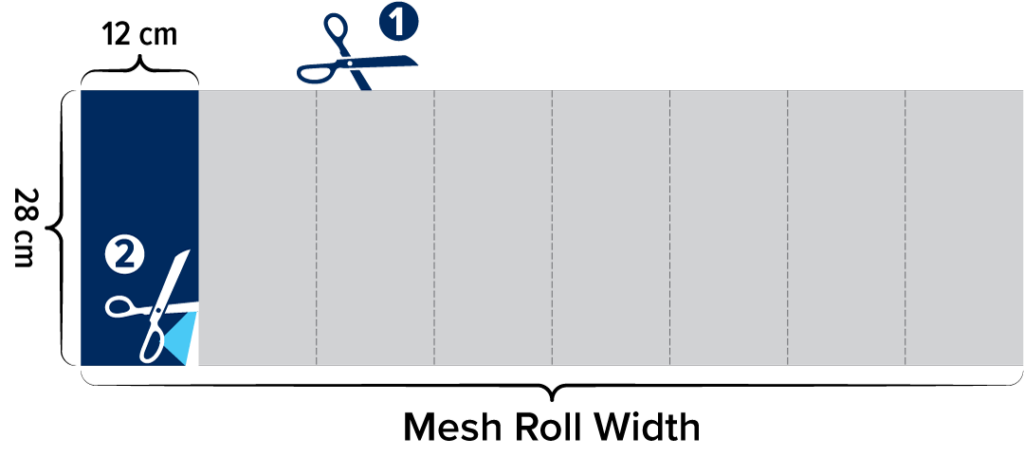
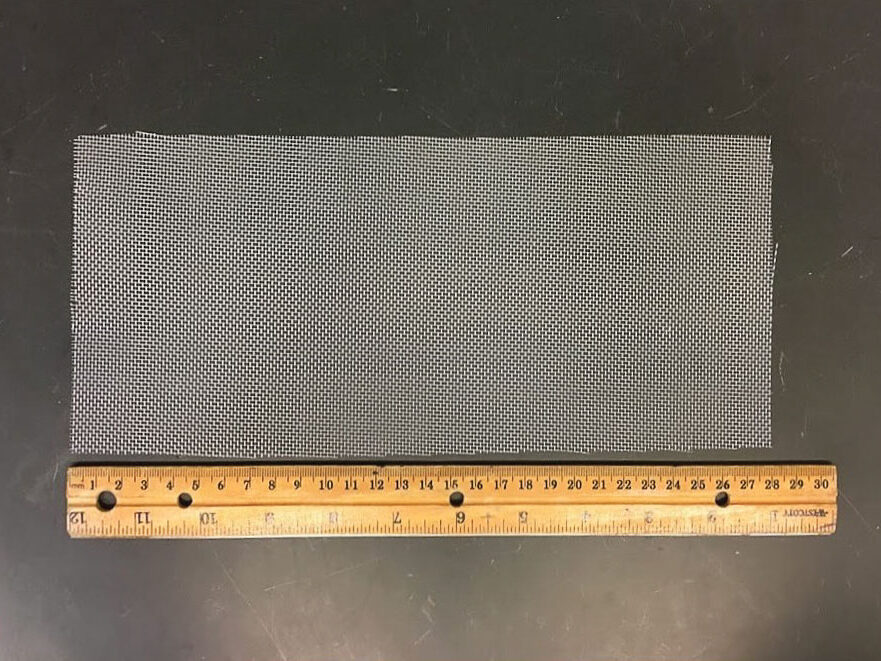
- Cut nylon mesh into a 28 cm (11 in.) strip across the roll (Fig. 4).
- Cut the 28 cm strip into 12 × 28 cm (4.7 in. x 11 in.) pieces (Fig. 4, Fig. 5).
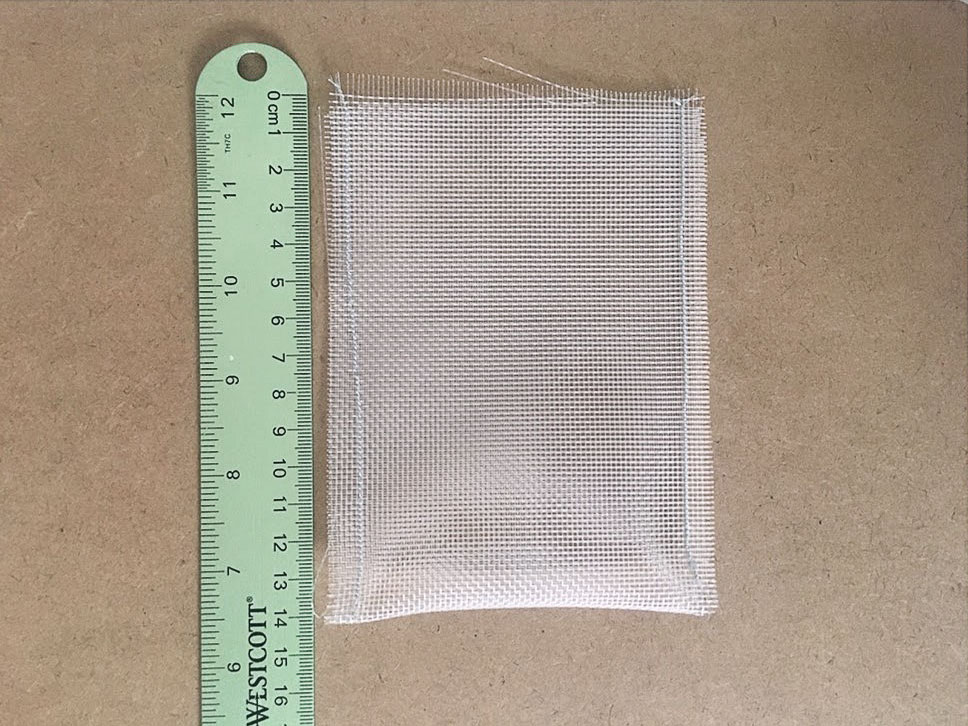
- Fold each 12 × 28 cm strip of nylon mesh fabric in half to form a 12 × 14 cm (4.7 in. × 5.5 in.) rectangle.
- Sew together the 14 cm (5.5 in.) sides using polyester or nylon thread to create a mesh bag with one open 12 cm side (Fig. 6). Using a serger or overedge stitch on a sewing machine is recommended to reduce mesh fraying.
- Completed bags dimensions are 12 × 14 cm (4.7 in. × 5.5 in.).
Collecting Mulch Samples

- Either new or weathered mulch can be used to measure the degradation of BDM in soil. For each new mulch roll, desired plot, or representative section of the field, collect one mulch sample that is at least 18 × 8 cm (7 × 3 in.), with the long side in direction of mulch laying (Fig. 7, red line).
- Cut each sample into two 8 × 6 cm (3 × 2.3 in.) pieces using a rotary mat and rotary cutter, ensuring that the 8 cm side of the mulch is in the direction of mulch laying (Fig. 7, dashed yellow lines). This is important as plastic mulches have different vertical and horizontal properties!
Skip these steps if using new mulch samples:
- Gather the weathered mulch samples no more than 4 days before adding mulch samples to the mesh bags.
- Collect the mulch samples from the middle top of the raised bed or row (Fig. 7), and place samples in a labeled plastic bag.
- Maintain the samples under ambient temperature conditions during transport. Store samples at 4°C (39°F) until ready to place in the mesh bags.
- Remove the mulch samples from the plastic bags and with a soft-bristled brush, gently brush the mulch surface to remove any soil or plant debris. Removing debris will facilitate and improve the accuracy of cutting and imaging the samples.
- For each mulch sample, create a code system using pre-numbered engraved aluminum tags (Fig. 8) that corresponds to individual plots and retrieval dates (Table 1).
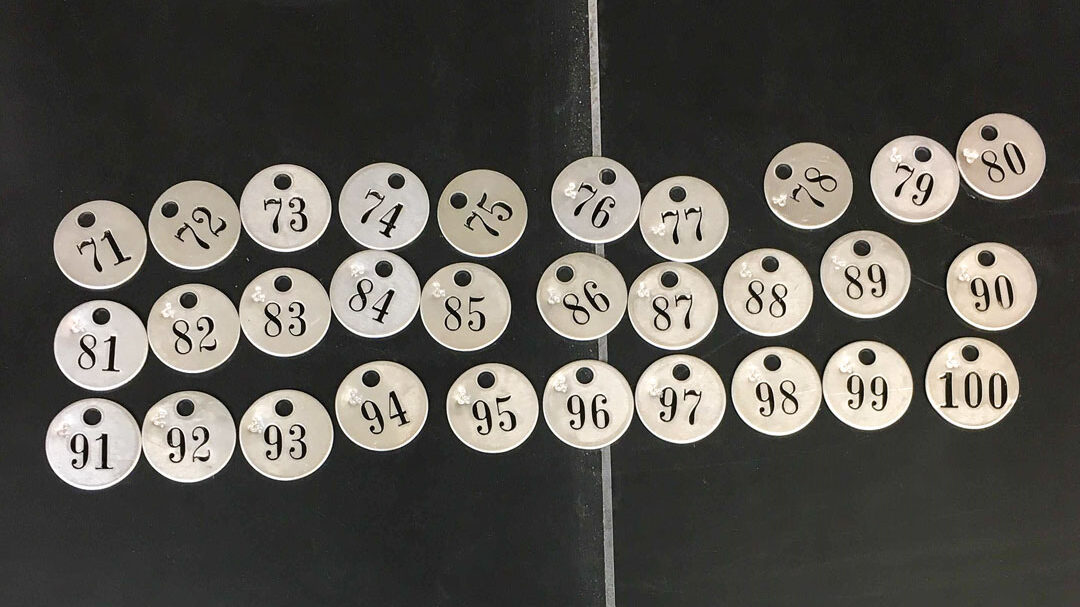
Table 1
| Tag Number | Mulch | Plot | Retrieval Date |
|---|---|---|---|
| 71 | BDM #1 | 1 | 10/22/2023 |
| 72 | BDM #2 | 2 | 10/22/2023 |
| 73 | BDM #3 | 3 | 10/22/2023 |
| 74 | BDM #4 | 4 | 10/22/2023 |
Photographing Mulch Samples
Photograph each mulch sample using a consistent method:
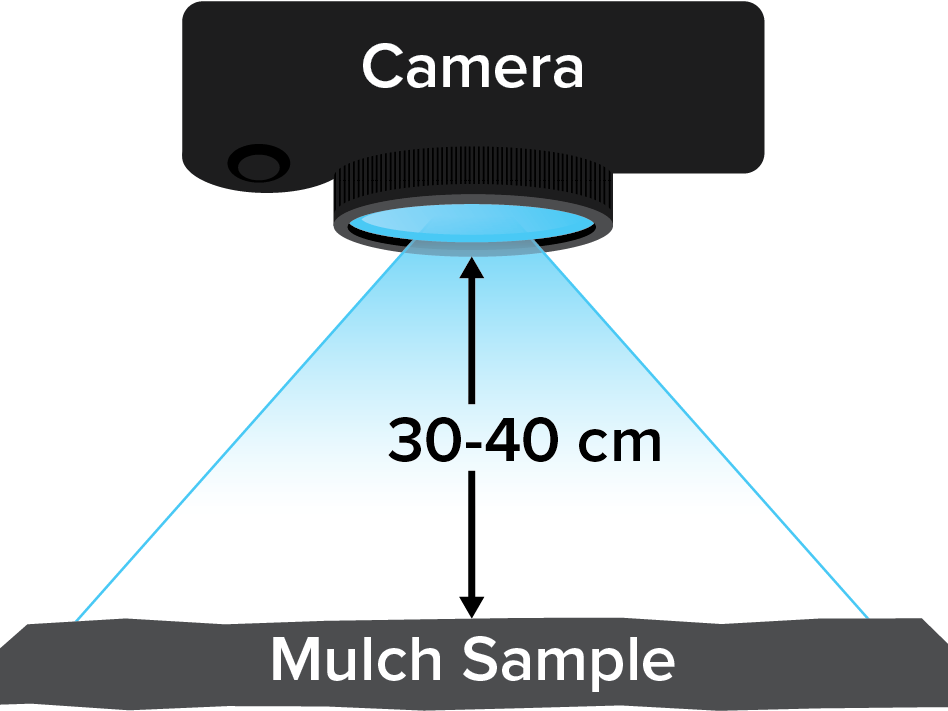
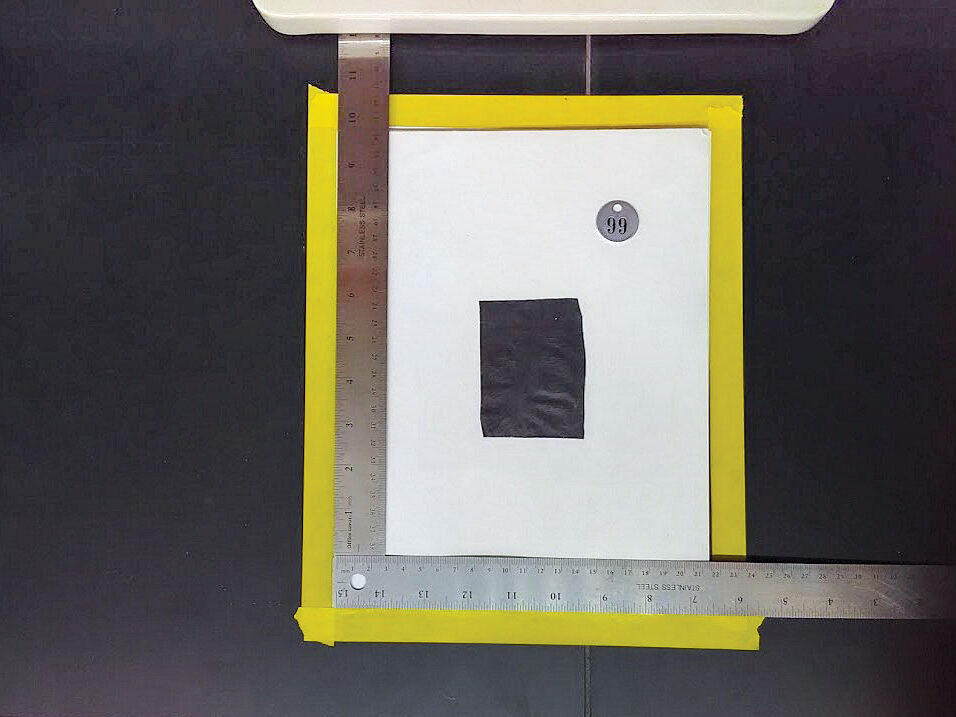
- Using a stationary platform (Fig. 9), photograph each 8 × 6 cm mulch sample from a height of 30-40 cm (11.8-15.7 in.) above the sample. The camera lens should be perpendicular to the sample.
- Place the labeled aluminum tag next to the mulch, with the number clearly visible, and place two rulers in the image for calibration and area determination (Fig. 10).
- To ensure accuracy of surface area measurements: use the same lighting and camera settings for all photographs; check the camera’s scale settings between photos and keep consistent; if using a global scale, check the scale settings after digitizing a few images, as slight changes in camera settings may result in measurement errors.
- Save each image and record when the photo was taken.
- Use ImageJ to calculate the area of each mulch sample. This initial area measurement will be compared with future images to calculate degradation.
Mulch Samples in Mesh Bags
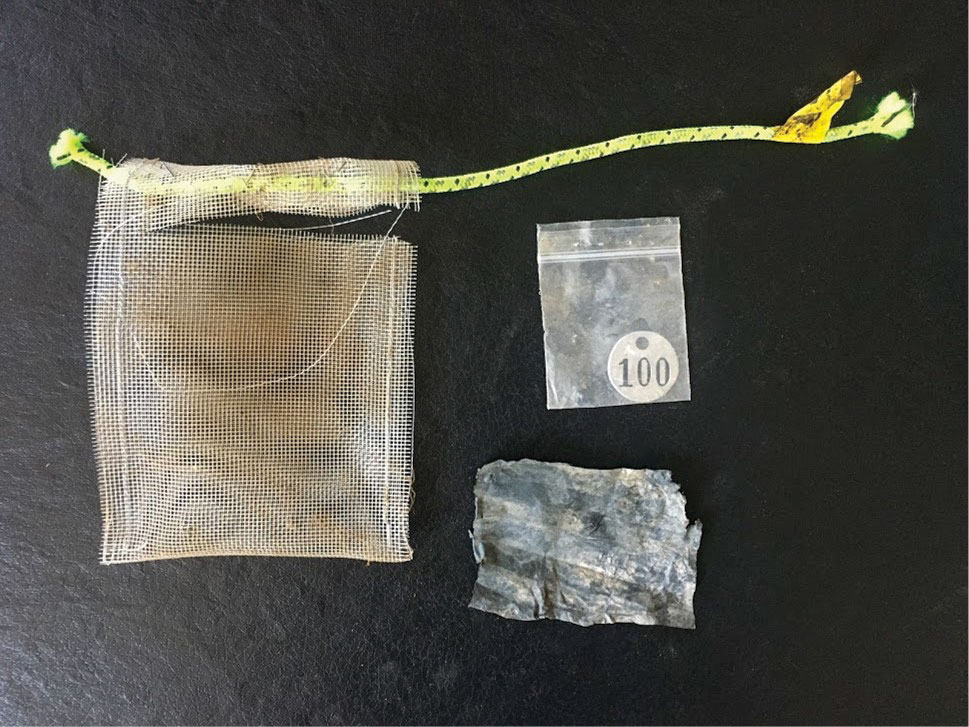
- Place each mulch sample into its mesh bag and place the corresponding aluminum tag into a separate 5 × 5 cm (2 in. × 2 in.) sealable plastic bag (Fig. 11). This will separate the aluminum tag from the mulch sample so that the tag does not affect mulch degradation.
- Add about 200 g of soil into the mesh bag, 100 g on each side of the plastic film (one scoop with small hand trowel will give about 100 g of soil). This will sandwich the plastic film between two layers of soil. Flatten the soil on each side of the plastic film and make sure the film is completely covered with soil. Then staple the mesh bag near the top by folding over the mesh at the top.
- If you will be sampling degradation over time, you need multiple mesh bags so that you can remove one bag at each measurement time. If you are using this method for research, ensure that you have enough replicate mesh bags for statistical analyses.
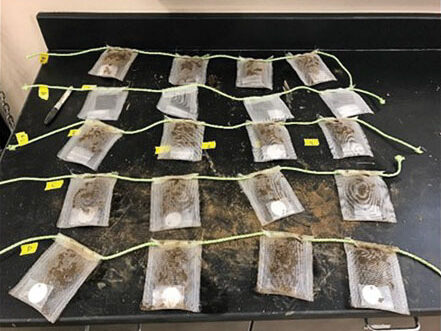
- If you have multiple bags per site in the field, attach the mesh bags together with a nylon rope to keep the bags together and prevent them from being lost once they are buried (Fig. 12). Place the rope along the open top of the bag, fold the bag over the rope and using stainless steel staples, staple closed the two corners and add two staples along the top center of the bag.
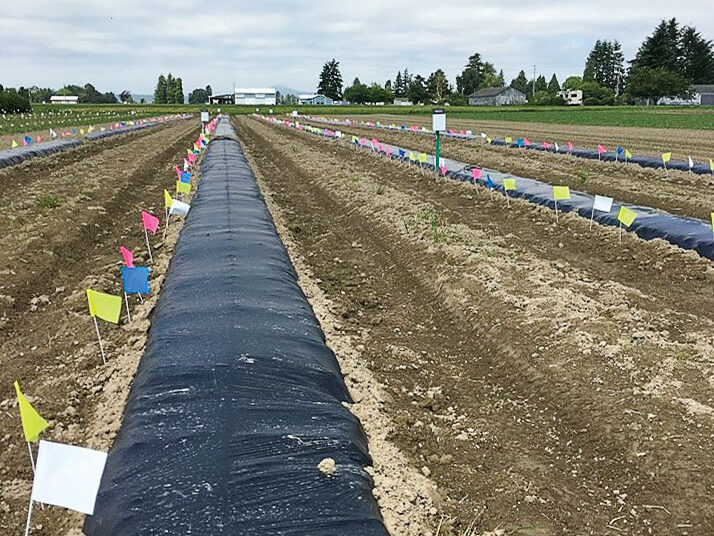
- For the mesh bag field burial sites, choose areas which are the most representative of the overall field. If this is a study with an experimental design, choose areas that represent the overall plot.
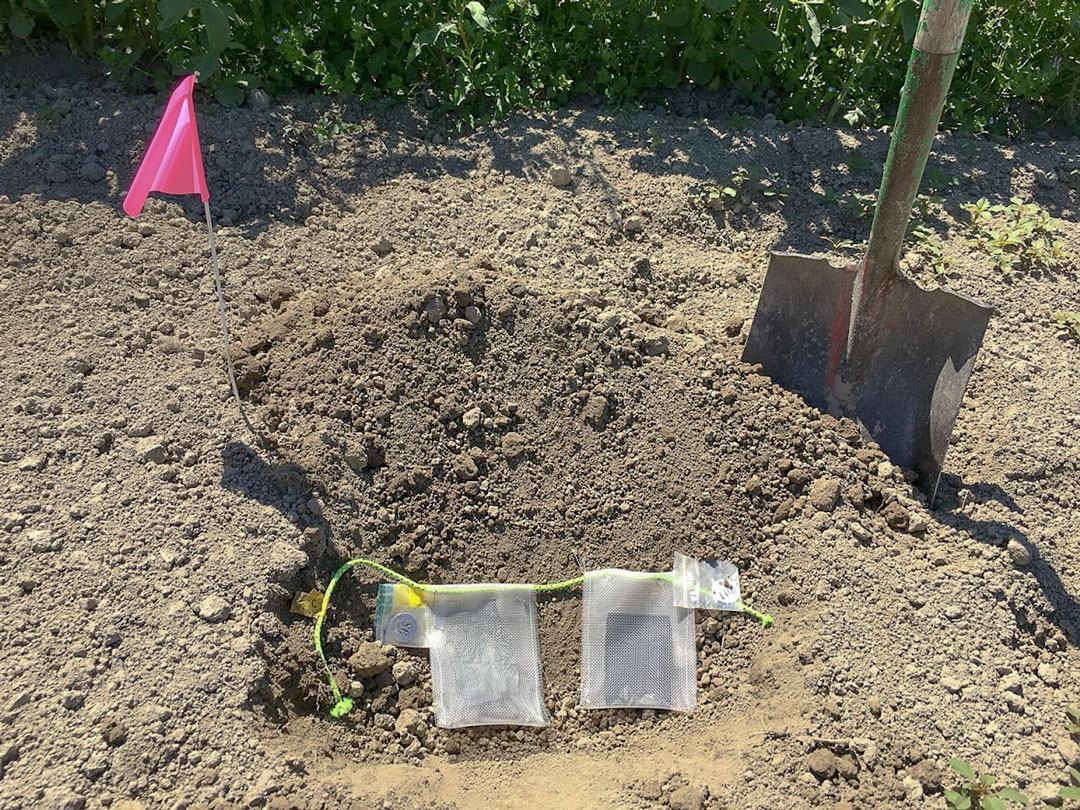
- Bury the mesh bags at a depth of 10 cm (3.9 in.) and at a 45-degree angle to the ground. Make certain the stapled side of each bag is facing the same direction.
- Mark each burial site with a flag to keep track of each mesh bag location (Fig. 13). Make note of the distance from a physical marker in case flags are inadvertently removed.
Mesh Bag Collection and Imaging for Degradation Assessment
- A standard sampling timeline is to remove one mesh bag per plot every 6 or 12 months for a minimum of 2 years.
- Remove one mesh bag per plot or location at each sampling interval. If needed, store mesh bags at 4°C (39°F) for no longer than 4 days after collection.
- Using a wet paper towel, gently clean off adhered soil from each mesh bag.
- Cut open the stapled side of each bag, being careful to not cut the mulch. Carefully remove the mulch sample and place on a flat surface with its corresponding tag. Be cautious of drafts that could blow away pieces of mulch.
- Photograph each mulch sample using the ImageJ method described in Photographing Mulch Samples, keeping camera settings, angle, and height consistent to ensure accuracy.
- Upload the images into ImageJ and calculate the mulch area of each sample.
- Calculate mulch degradation by comparing the area of each mulch sample to its area prior to burial:
( ( Original Area – Area After Burial ) / Original Area ) × 100% = % Area of Mulch Lost - Record the percent area of mulch lost to determine visual degradation over time.
Literature Cited
- European Norms (EN). 2018. Plastics – biodegradable mulch films for use in agriculture and horticulture – requirements and test methods. European Standard 17033, European Committee for Standardization, Brussels, Belgium.
- Ghimire, S., D. Hayes, J. Cowan, D. Inglis, L. DeVetter, and C.A. Miles. 2018. Biodegradable plastic mulch and suitability for sustainable and organic agriculture. WSU Extension FactSheet FS103E.
This material is based upon work that is supported by USDA SCRI award 2022-51181-38325 and WSARE award 2019-51181-30012. Additional support was provided by the National Institute of Food and Agriculture Hatch project 1017286. Any opinions, findings, conclusions, or recommendations expressed in this publication are those of the author(s) and should not be construed to represent any official USDA or U.S. Government determination or policy.

WSU Extension programs and employment are available to all without discrimination. Evidence of noncompliance may be reported through your local WSU Extension Office.